Home Makeovers
How to Create DIY Wooden Beams for a Farmhouse-Inspired Ceiling

Wood ceiling beams are a highly desirable feature that bring both architectural appeal and a rustic touch to any room. Unfortunately, many homes, especially those built with more basic designs, don’t include these stylish elements. If you live in a builder-grade home with plain ceilings, there’s no need to fret—you can easily create the look with our simple DIY guide. This project uses affordable whitewood boards, which are glued and nailed together, and when stained, they resemble the warm, weathered look of reclaimed wood. Adding these DIY beams to your ceiling will instantly infuse your space with character and farmhouse charm. Follow these easy steps from Jenna Diermann of Jenna Sue Design Co. on how to make rustic wood beams in just three simple steps.
What You’ll Need
Equipment / Tools:
- Drill
- Nail gun
Materials:
- 1×4 whitewood boards
- 1×6 whitewood boards
- 4-inch screws
- Wood glue
- Nails
- Wood filler
- Wood stain
- Beam straps (pliable metal strips available at most home improvement stores)
- Spray paint
Instructions
Step 1: Lay the Groundwork

Courtesy of BHG
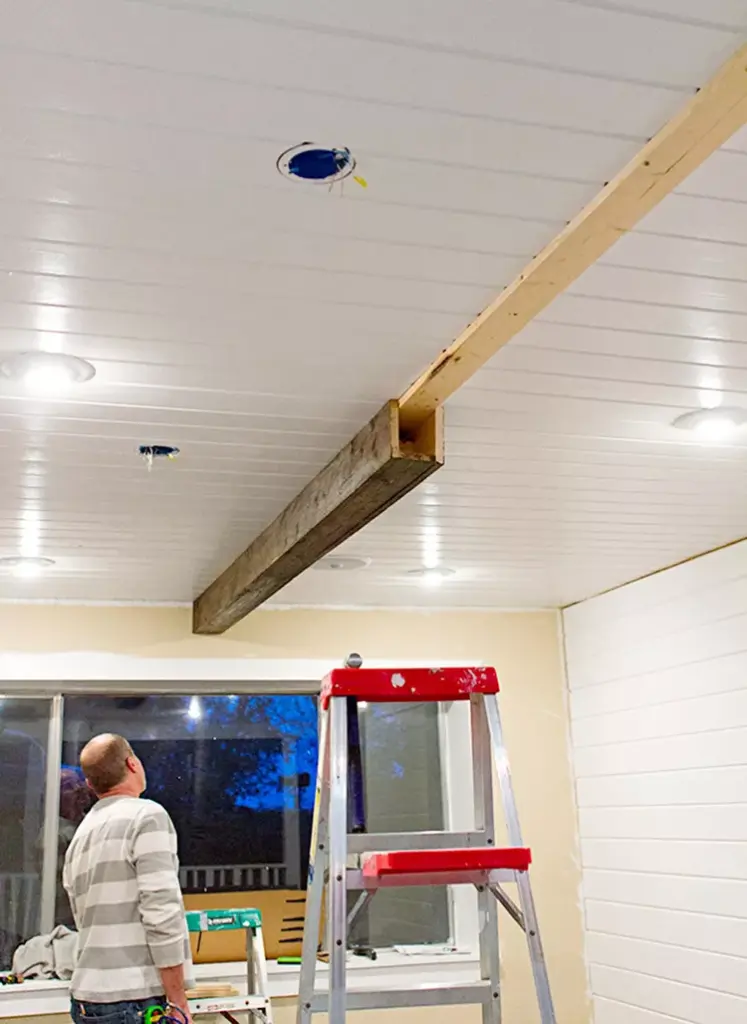
Before you begin installing wood beams, the first step is to determine their placement. Carefully examine your ceiling to locate joists, light fixtures, and any other obstructions that could affect your beam positioning. Once you’ve mapped out the layout, attach 1×4 boards along the length of your ceiling. These will serve as the guide for your beams. Secure the boards to the ceiling joists using 4-inch screws.
Step 2: Make Ceiling Beams

Courtesy of BHG
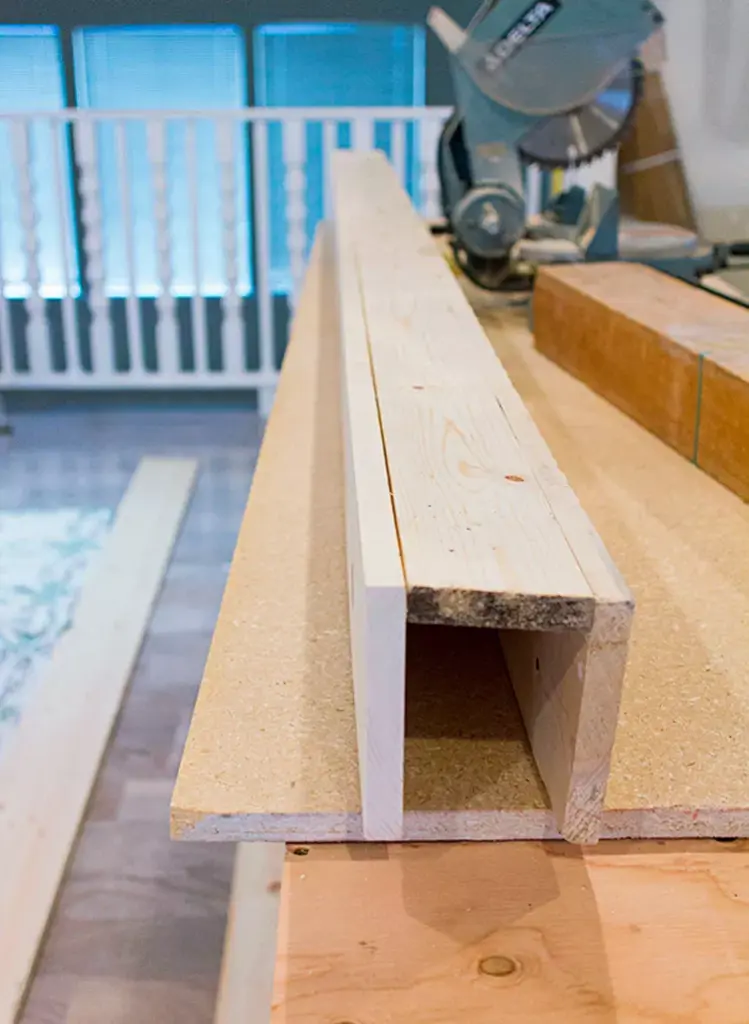
Next, you’ll construct the beams themselves. Start by building simple 3-sided boxes using one 1×4 and two 1×6 whitewood boards. Apply wood glue to join them, and use a nail gun to secure the pieces in place. After assembling the boxes, fill any visible nail holes with wood filler, then distress the beams and stain them for a rustic, reclaimed wood look. Continue creating these boxes until you have enough to cover the entire length of your ceiling. These will be your finished ceiling beams. Slide them over the 1×4 ceiling guide and secure them by nailing through the beam into the guide board.
Step 3: Cover the Seams

Courtesy of BHG
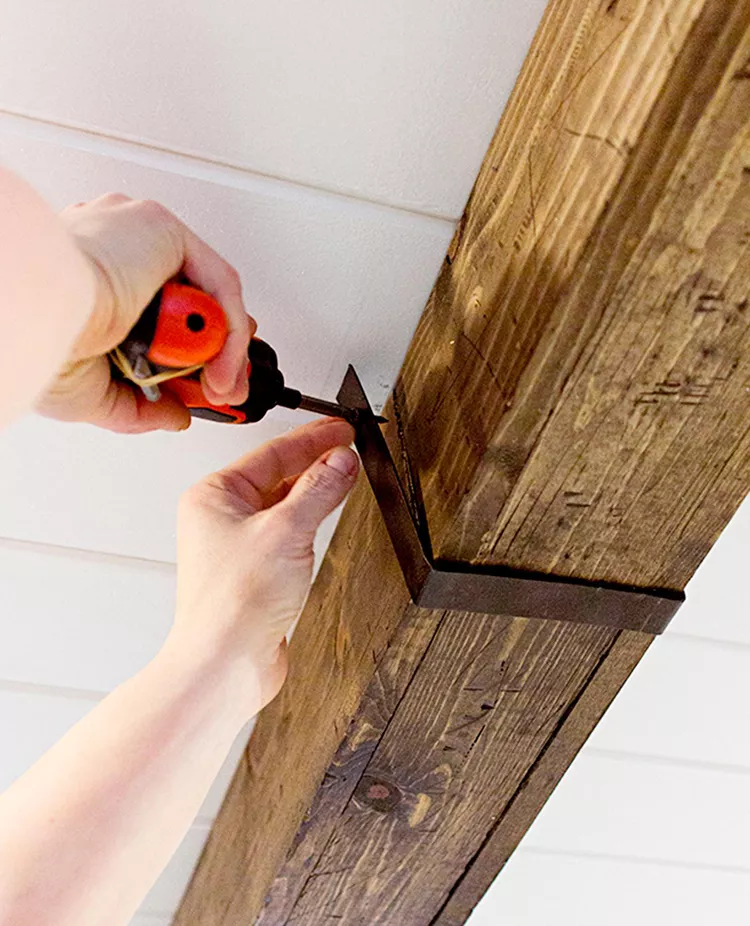
To finish off your beams, create beam straps from pliable metal strips, which can be found at most home improvement stores. Before attaching the straps, spray paint them to give them the appearance of oil-rubbed bronze. Once dry, slide the straps over the seams between the boxes and secure them in place by screwing them into the beams.
By following these easy steps, you can transform your ceiling with beautiful, rustic wood beams that add a touch of farmhouse style to your home.


